
Using three.js, there are different ways to create the effect of an 'infinite world' where a user can never reach the end due to it dynamically regenerating more terrain.
This post looks at a couple alternative ways to create this effect, leading towards the goal of enabling a user to navigate a world in first person, without reaching the edge.
1. The stationary camera trick
One possible way to create this effect can be seen in 'Seeing Sounds Part 4' where the terrain was infinitely animating based on a stationary camera. Here, objects are animated towards and past the camera, to be repositioned at the start where the cycle would continue, as seen below:
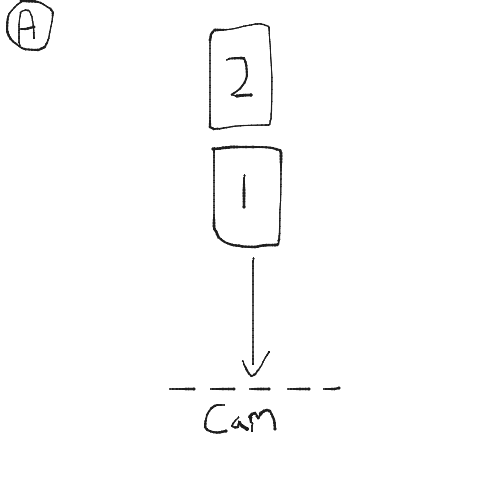
I've used stars in the diagram above as it's the same example used in a previous stars tutorial I have written which you can read to get a better understanding of the method. The stars can be used interchangably with other objects such as large planes of terrain.
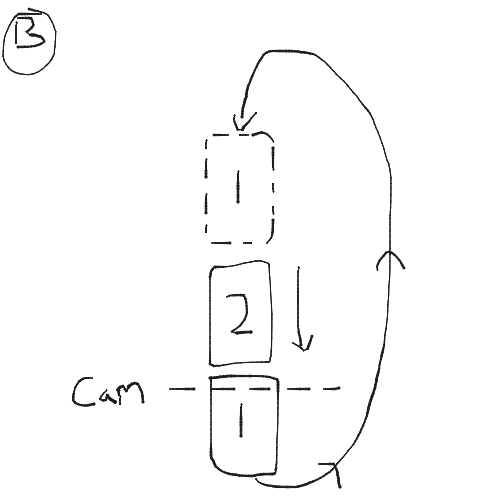
2. First person infinite worlds
The previous method is fine for situations where the camera is stationary, but if we want to enable a user to explore the world in first person (like a shooting game such as doom), the camera would now be following the user, meaning the above trick wouldn't work (correct me if I'm wrong in the comments).
To enable a first person mode and still create an 'infinite world' effect, we would now need to track the movement of the camera, and position the ground around it as seen in this blog, and the image below:
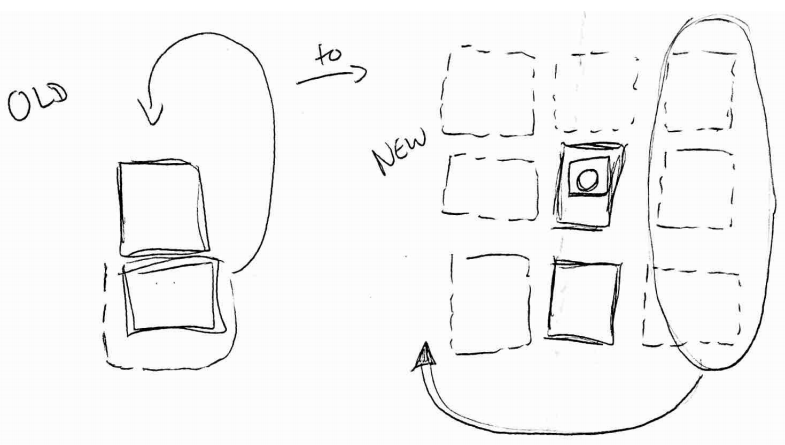
To the left of the image is the way described in the first explanation in this post, and on the right is the dynamic camera approach.
In the image on the right, we have 9 pieces of terrain as opposed to previously having two. This enables us to have a central position which is where we want to keep the camera.
For example, if the camera moves from the centre into the next terrain on the left (in the image it would move one square to the left), the set of terrains from the right (those circled in the image) would be repositioned in front of the camera to the left (as shown by the arrow in the diagram) - thereby keeping the camera in a central square.
This idea is explained further in this blog, so read there for more details.
Trying it out
I have now created a first version of this which can be seen here.